
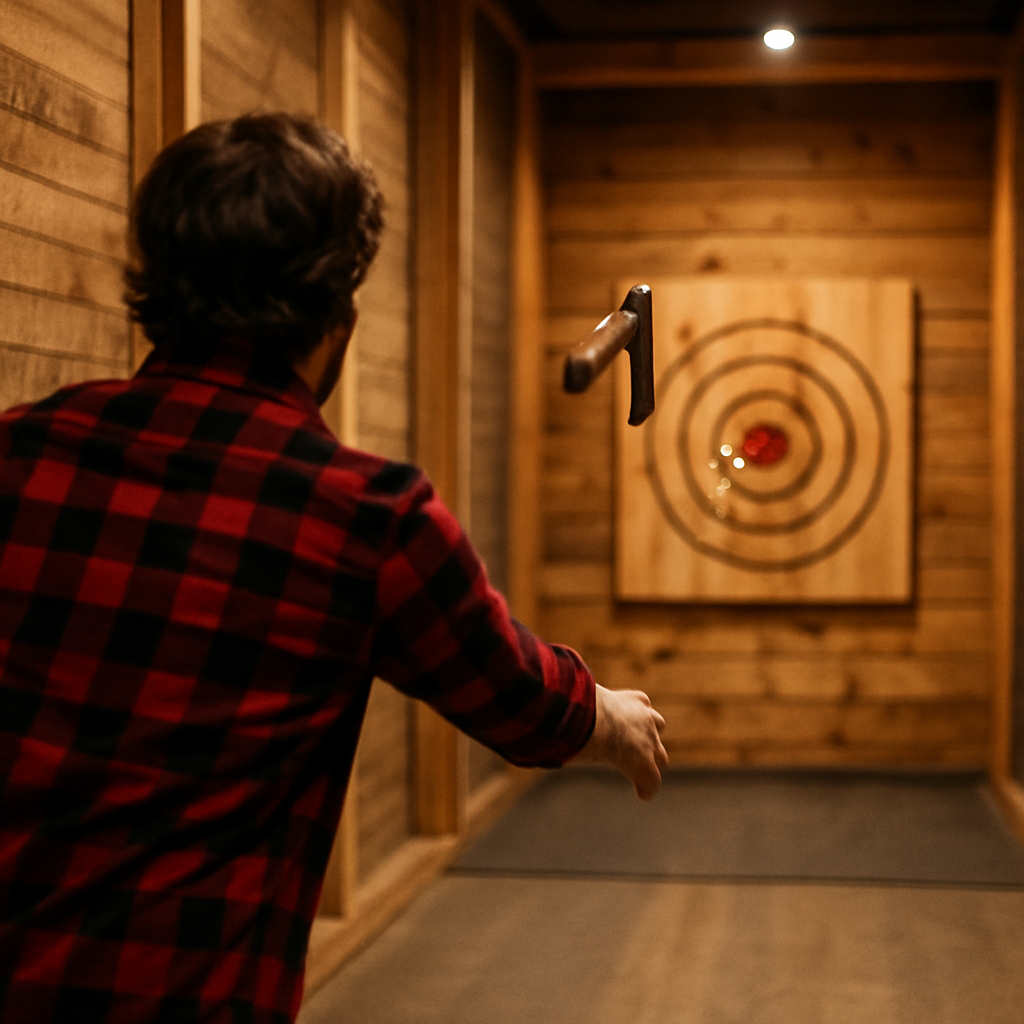
How to Throw an Axe: A Complete, Beginner‑Friendly Guide (Austin Edition)
Safety‑first technique, step‑by‑step coaching cues, and pro tips from Axe Force Austin
Whether you're planning a date night, team‑building event, or just want to master a new skill, learning how to throw an axe is surprisingly approachable—and incredibly satisfying. This guide teaches you the fundamentals the way a coach would on the lane: simple cues, repeatable steps, and quick fixes when throws go off target. We'll cover stance, grip, distance, one‑ and two‑hand throws, rotation control, common mistakes, equipment basics, and safety. Expect lots of practical coaching language you can use right away.
Helpful links to explore before or after you throw:
Safety First (and Always)
Axe throwing is safe when it's supervised and everyone follows the rules. Every good venue begins with a safety briefing. Here are the essentials that keep the lanes fun and incident‑free:
- Listen to your coach or lane host. If they say stop—stop.
- One thrower in the lane at a time. All others remain behind the safety line.
- Never cross the foul line until both axes have fully stopped moving and are retrieved.
- Check your surroundings before you throw or retrieve—no phones, drinks, or distractions in the lane.
- Hold the axe by the handle only. Never hand an axe blade‑first; place it head‑down on the wood when not in use.
- Closed‑toe shoes required; tie back long hair; remove dangling jewelry.
- Never throw a damaged axe (loose head, cracked handle) or at a damaged target that could cause bounce‑backs.
- Absolutely no horseplay. Axe throwing is a sport, not a party trick.
Professional organizations like the WATL (WATL) and the International Axe Throwing Federation (IATF) publish detailed rules used by many venues. For official competition play, you'll follow their standards for targets, distances, and scoring. See the links above to dig in more.
Know Your Axe (Beginner Equipment Basics)
Most venues provide regulation throwing hatchets—small axes designed for one rotation from a set distance. As a beginner, a standard venue‑supplied hatchet is perfect. If you're shopping for your own, focus on a comfortable handle, secure head fitment, and a blade that will take and hold a fine edge.
- Weight: Most throwing hatchets fall around 1.25–1.75 lb. Heavier doesn't always mean better for beginners.
- Handle: Wood offers great feel; synthetics are durable. Choose what fits your grip without strain.
- Edge: You want sharp—but not razor fragile. A clean, consistent bevel helps the axe stick reliably.
- Balance: A well‑balanced hatchet feels neutral in hand and doesn't fight your swing path.
Maintenance matters, too. A properly sharpened and maintained axe will stick more often, which builds confidence. Learn basic care: light sharpening, oiling wooden handles, and checking the head for tightness. Our 'Axe Care' link above covers fundamentals for home maintenance.
Your Setup: Stance, Distance, and Target Focus
Consistency starts before the axe moves. A repeatable stance and distance make your throw easier to time and control.
- Stand square to the target with feet about shoulder‑width apart. If one‑handed, your throwing‑side foot can be slightly back.
- Distribute weight evenly. Stay relaxed—tense shoulders cause jerky releases.
- Eyes on a single dot on the bullseye. Laser focus beats 'aiming at the whole target.'
- Establish a consistent starting distance. Most venues mark lines (e.g., ~12–15 feet) for standard one‑rotation throws.
Pro tip: If your axe over‑rotates (blade points down on stick or hits handle‑first), move closer. If it under‑rotates (blade points up or hits with the top of the blade), move back. Small adjustments of 2–4 inches can make a big difference.
Grip: Firm, Not White‑Knuckle
A good grip controls the axe without strangling it. For both one‑ and two‑hand throws, think 'firm handshake'—secure but not crushing. Excess tension delays your release and tilts the blade.
- Thumb wraps around the handle—not straight up the spine like a 'thumbs‑up' grip.
- Knuckles roughly in line with the blade; keep wrists neutral to avoid unwanted side spin.
- If using two hands, stack the non‑dominant hand over the dominant, palms touching, elbows soft.
Step‑by‑Step: The One‑Handed Throw
- Set your stance. Square up, eyes on your tiny target spot.
- Extend your throwing arm forward toward the bullseye, axe blade vertical.
- Load: Bring the axe straight back by bending the elbow and a touch of shoulder—keep the blade roughly vertical.
- Smooth forward swing: Lead with the elbow; keep your forearm and the axe moving on a straight line to the target.
- Release at eye level: As your hand passes your eyeline, open your fingers and 'let the handle leave your hand.' Don't flick the wrist.
- Follow‑through: Your hand should continue toward the target, palm down, finishing near the opposite hip.
Coaching cue: If your axe consistently drifts right (for a right‑hander), your release is late. Relax the grip and picture 'opening' the hand slightly earlier. If it drifts left, you're early—feel the weight a fraction longer before letting go.
Step‑by‑Step: The Two‑Handed Throw
Two‑handed throws feel natural to many beginners because they reduce wrist action and keep the swing symmetrical. They're also great for building a consistent release.
- Stance square, feet shoulder‑width. Both hands on the handle, non‑dominant over dominant.
- Extend the axe forward, blade vertical, then bring it back overhead in a controlled motion.
- Keep elbows slightly bent—don't lock out your shoulders or hyper‑arch your back.
- Drive the axe forward with your core and shoulders, keeping the blade on a straight path.
- Release when your hands pass eye level. Imagine 'letting the handle float forward.'
- Follow through with hands pointing toward the bullseye; avoid chopping down or yanking sideways.
Dialing In Distance and Rotation
- Perfect stick: Blade is nearly vertical (slight top‑lean is fine).
- Over‑rotation: Blade leans downward—move closer in small steps.
- Under‑rotation: Blade leans upward—step back in small steps.
- Record your 'home base'—find a board line or knot in the floor to stand on every time.
Advanced tip: Many competitive throwers use tiny foot shuffles to fine‑tune rotation between throws. If your first throw in a set over‑rotates by just a bit, shuffle forward 2–3 inches next time.
Release Timing and a Straight Swing Path
- Think 'hammer throw,' not 'baseball pitch.' The axe moves on a vertical plane toward the target.
- Avoid wrist flicks. Let the axe's weight create rotation naturally.
- Keep your eyes on a tiny spot in the bullseye throughout the swing and release.
- Finish with balanced posture. If you're falling forward, you're over‑muscling the throw.
Troubleshooting: Quick Fixes for Common Misses
- Axe bounces off the target: Likely too dull or you hit at an angle. Check edge sharpness (venue staff can help). Reduce speed and focus on a straight swing; move a couple inches closer if under‑rotating.
- Axe hits handle‑first: Over‑rotation. Step closer or release a hair earlier. Also check that your backswing isn't too deep.
- Axe hits with top of blade (under‑rotation): Step back slightly or hold the axe a fraction longer before release. Smooth out the forward drive—don't 'short‑arm' it.
- Consistent left/right misses: Left = early release, Right = late release (for right‑handers). Mirror this if left‑handed. Loosen your grip tension and keep your eyes on the exact aiming dot.
- Wild side spin: Wrists are twisting. Keep knuckles aligned with the blade and visualize a straight‑line hammer strike.
- Fatigue / elbow soreness: Reduce effort. Axe throwing is timing and alignment, not a strength contest. Use more body and less arm speed.
Skill‑Building Drills You Can Do on a Lane
Short, focused drills beat random hurling. Here are structured, 5–10 minute blocks you can run at Axe Force Austin or any supervised venue:
- Nine‑Spot Focus: Divide the bullseye area into a tic‑tac‑toe grid in your mind. Throw one axe at each 'square,' working top‑left to bottom‑right. This tightens aim and teaches micro‑adjustments without chasing the center every time.
- Release Ladder: From your home distance, throw three sets of 3. On each set, intentionally release a hair earlier, then on‑time, then a hair later. Notice how the axe lands and log the differences.
- Distance Micro‑Shuffles: Start at home base. After each throw, shuffle forward 2 inches and throw again until you see over‑rotation. Then shuffle back in 2‑inch steps until you see under‑rotation. Mark the sweet spot.
- Slow‑Motion Throw: Perform five ultra‑slow, no‑release swings tracing your exact path. Then make one normal throw. This engrains the straight‑line path and calm shoulders.
- Two‑Hand Consistency Set: Throw five two‑handers focusing on identical start position, identical breath, identical follow‑through. If your grouping tightens, you're winning—even if every throw isn't a bullseye yet.
Deep Dive: Biomechanics and Advanced Techniques
If you love understanding the 'why' behind good throws, this section breaks down simple biomechanics you can feel in your body. Nothing here requires superhuman strength—just alignment and timing.
Posture & Core: Keep ribs stacked over hips. When you draw the axe back, avoid flaring the ribs or hyper‑arching your lower back. A neutral spine gives you a stable, repeatable path forward.
Shoulders & Elbows: Let the shoulders stay low and relaxed. In the forward swing, the elbow should 'lead' the hand for a moment, keeping the head of the axe on a straight track. Locked elbows or shrugged shoulders add wobble and side spin.
Release Window: Think of a small 'release window' centered at eye level. Early in the window, the axe starts left (for right‑handers); late in the window it starts right. Your goal is to feel the moment where the axe seems to 'float' off your fingers straight ahead.
Follow‑Through: Great throwers 'finish their picture'—the hand continues toward the bullseye with palm down, then naturally descends. If your hand snaps downward or pulls across your body, you introduce curve and side spin.
1.5‑Rotation Throws (for later): Once you're consistently sticking one‑rotation throws, some venues allow 1.5 rotation at longer distances. It's a fun challenge, but keep safety first and ask a coach to supervise your attempts.
Fun Games to Play While You Practice
- Around the World: Hit each ring from outside to center. You can't advance until you stick the current ring.
- 21 (Blackjack): Bullseye = 5, inner ring = 3, outer ring = 1. First to exactly 21 wins; over 21 drops you back to 15.
- H‑O‑R‑S‑E: Call your shot (e.g., 'left‑high ring'). If you hit and your partner misses, they take a letter.
- Sudden Bull: Each thrower gets one throw per round. Any bullseye knocks the others out that round.
Thinking About Friendly competitions or Competition?
Once your throw is consistent, competition night is a blast. You'll meet coaches and throwers who love to share tips. Most venues align with either WATL or IATF rules for distances, scoring, and target specs.
Learn more and find events: WATL (WATL) and International Axe Throwing Federation (IATF)
Target Anatomy and Scoring Basics
Most house targets are concentric rings with a center bullseye. Depending on your venue's rule set, rings score different values and special 'clutch' or 'killshot' dots may be activated at certain times. Ask your host which rule set you're playing before starting a game.
Practical tip: Aim small, miss small. Instead of 'the bullseye,' pick a tiny wood grain line or knot inside the bull—your grouping will tighten immediately.
Lane Etiquette: Be the Thrower Everyone Loves to Play With
- Be ready when it's your turn—don't hold up the lane.
- Celebrate others' great throws. Axe throwing is a social sport.
- Share feedback only if asked; keep it encouraging and simple.
- Help keep the lane tidy—no drinks or phones in the throw zone.
Accessibility and Comfort Tips
Axe throwing can be adapted for many body types and abilities. If you have shoulder limitations, try two‑handed throws with a shorter backswing. If grip strength is an issue, ask for a handle with slightly more texture or diameter. Coaches can demo variations to make the motion comfortable and safe.
Coach's 30‑Minute Lesson Plan (Use This on Your First Visit)
- Minutes 0–5: Safety talk, shoe & hair check, warm‑up swings without release.
- Minutes 5–10: Two‑handed throws only, focus on straight path and gentle release.
- Minutes 10–15: Find your rotation sweet spot with 2–4 inch micro‑shuffles.
- Minutes 15–20: Switch to one‑hand throws; compare feel and accuracy.
- Minutes 20–25: Troubleshoot based on stick angle (distance tweaks, timing cues).
- Minutes 25–30: Play a quick mini‑game (H‑O‑R‑S‑E or 21) to make practice fun.
Four‑Week Progression Plan (2 Sessions per Week)
If you catch the bug (you probably will), use this simple four‑week plan to build reliable form and have fun doing it.
- Week 1: Foundations: Two sessions focused on two‑handed throws. Establish stance, grip, release window. End each session with 10 one‑hand throws just to explore.
- Week 2: Consistency: Mix 50/50 two‑hand and one‑hand. Run Distance Micro‑Shuffles and Release Ladder drills. Start logging where your successful sticks land.
- Week 3: Precision: Aim small. Run Nine‑Spot Focus each session. Add intentional 'called shots' and gentle pressure games like Sudden Bull.
- Week 4: Game‑Ready: Choose your preferred throw (one‑hand or two‑hand) and play full games using house rules. If you're curious, visit competition night to watch or sub in.
Myths vs. Facts
- Myth: You need lots of strength. Fact: Technique and timing dominate. Kids and grandparents routinely stick bullseyes with proper form.
- Myth: You should 'chop down' at the target. Fact: The best throws travel straight, not downward. Think 'reach forward and place,' not 'swing down.'
- Myth: Faster is better. Fact: Smooth and repeatable beats fast. Extra speed often adds wobble and bounce‑offs.
- Myth: If it doesn't stick, throw harder. Fact: Check rotation and blade angle first. Often you just need a tiny distance tweak.
Austin Tips: Make a Night of It
If you're throwing at Axe Force Austin near Southpark Meadows, you're minutes from great food and drink. Plan a full evening: throw for an hour, grab dinner, then come back with friends for a rematch next week. Axe throwing shines as a repeated skill date—every session you'll notice improvement.
Ready to try? Book your lane at Axe Force Austin and ask a coach to run you through the drills in this guide.
FAQ: Quick Answers for First‑Timers
Do I need upper‑body strength to throw an axe?
Not really. Clean technique and timing matter more. Many first‑timers hit bullseyes in their first 10 throws.
What should I wear?
Closed‑toe shoes, comfortable clothing that lets you move your shoulders, and no dangling jewelry.
Is axe throwing safe?
Yes—when supervised and when participants follow venue rules. Stick to one thrower in the lane, and retrieve only when axes are still.
Can kids throw?
Policies vary by venue. Many allow younger throwers with parental supervision. Ask your venue for their age policy.
How long does it take to 'get good'?
With a coach and 30–60 minutes of focused practice, most people can consistently stick axes and start grouping near center.
Can I bring my own axe?
Some venues allow it if the axe meets safety and size requirements. Ask staff to inspect it before use.
Why did my axe bounce off?
Usually the blade hit at a poor angle or the edge is dull. Slow down, straighten your path, and ask for a sharper house axe.
Common Beginner Mistakes (and Simple Corrections)
- Muscling the throw: Relax. Smooth tempo and timing beat speed. Aim for 'quiet shoulders, steady hands.'
- Staring at the whole target: Pick a tiny speck to aim at—your brain steers the swing where your eyes live.
- Inconsistent starting distance: Mark a repeatable foot spot and use it every time.
- Death‑grip on the handle: Loosen your grip so the release isn't delayed. Firm, not crushing.
- Yanking down after release: Let your hand finish toward the bullseye. Think 'reach and place,' not 'chop.'
- Ignoring feedback: Every stick angle teaches you about rotation. Adjust 2–4 inches instead of guessing.
60‑Second Quickstart (Save This for the Lane)
- Stand square; feet shoulder‑width; eyes on a single dot.
- Grip firm, wrists neutral. Two hands stacked if you prefer.
- Bring the axe back smoothly; no leaning or arching.
- Drive forward on a straight path; release at eye level.
- Follow through toward the bullseye and hold your finish.
- Adjust distance in tiny steps based on stick angle.
Book Axe Throwing in Austin (Perfect for Date Nights and Teams)
Searching for 'axe throwing near me' in Austin? Axe Force Austin offers clean lanes, friendly coaching, and easy booking for birthdays, team outings, and spontaneous nights out. Bring your friends and learn how to throw an axe the right way—safely, consistently, and with a smile. Reserve your spot here: Axe Force Austin Booking
Have questions about private events or large groups? Ask about corporate team‑building, friendly competitions, or fundraising nights at the front desk or on our website.
Related Searches
axe throwing Austin, how to throw an axe, Austin axe throwing lessons, Austin date night ideas, team building Austin, beginner axe throwing tips, axe throwing near me, WATL rules, IATF throwing standards, axe lane safety, one‑hand axe throw, two‑hand axe throw, how far to stand for axe throwing, axe sticking tips